EX1: Adobe XD Prototyping
What is a prototype?
“A prototype is an interactive simulation of a digital product, such as a website or app. A prototype typically includes functionality that allows users to interact with the design, such as buttons, text fields, and more.” (Capuchino, nd).
Prototypes can be used by designers to demonstrate how interactions work on a web or mobile device. They can be shared to clients and team members to test the interface and receive feedback that can be refined and worked upon. Prototypes can be useful as they can show animations and transitions in real time, so stakeholders can navigate the interface themselves to see if it successful.
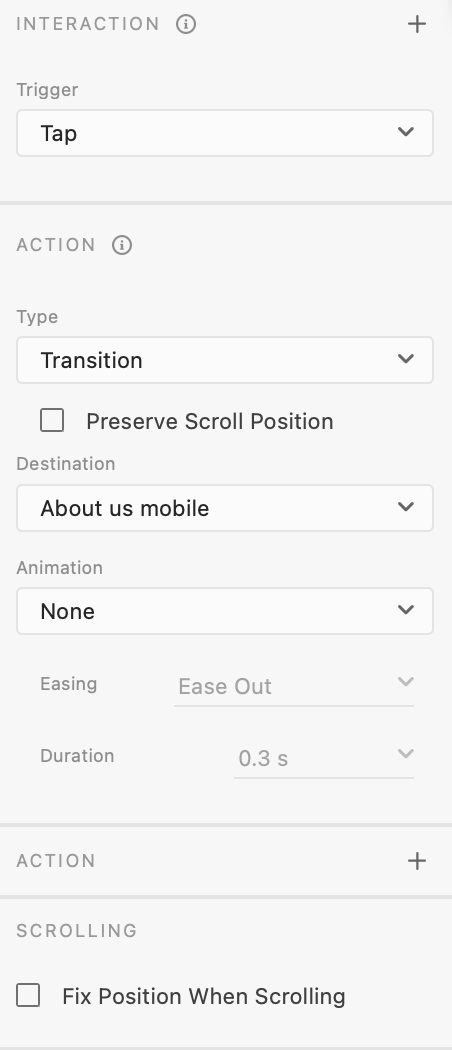
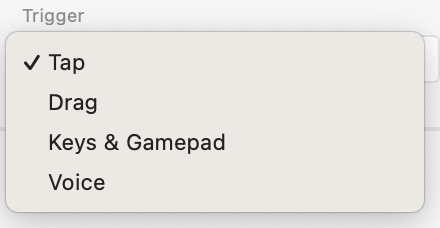

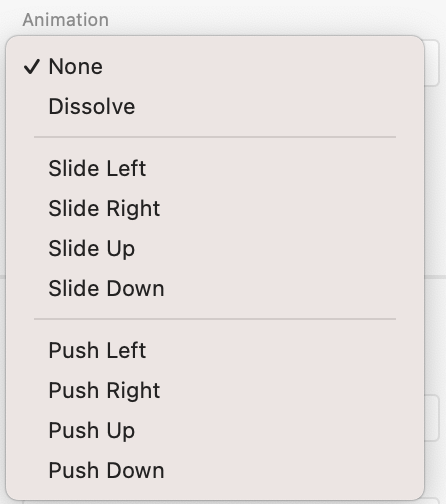
In Adobe XD, you can access the prototype panel to bring up a range of options that can customise how interactions occur. You can change how the animation is triggered, the style of animation and the transition between artboards. These options allow you to create an optimised user experience and enhance your prototype by showing how each screen navigates to another.
In this video, I demonstrate different types of prototypes in Adobe XD. These are my own examples that I created after following tutorials by Dani Beaumont on YouTube. There are four prototypes in this video, however I did create a fifth prototype using speech triggers, but was unable to record this so I have instead provided a link to the XD prototype itself.
Overlays Animation Prototype Link
Voice Animation Prototype Link (To activate the animation, say ‘Monstera’ when prompted)
Each tutorial takes you through a different method of creating a prototype. In the first, I have created a basic tap transition, where the user just has to click through to a new screen. This is the default setting when you wire two artboards and is very simplistic.
I then used another tap trigger, but this time used auto animate to transition between artboards. The auto animate option creates seamless transitions and can make it appear as if elements are moving on screen, when in fact the user has been brought to a different screen instead. This is useful for displaying galleries or items that are intended to be swiped through on a singular page.
The third uses a similar screen design, but this time the trigger is a drag one. Users have to click and drag through screens to slide through a section on screen. This is especially useful for when you are designing a mobile prototype and want to test it on a mobile device, where users swipe rather than click through.
The fourth uses a slide-up animation paired with an overlay action. This means that when the navigation menu is opened, the menu slides up but doesn’t fully cover the screen. If a menu is small and doesn’t need to take up an entire screen, the overlay action is the best tool to use. To create the overlay, the new artboard needs to have a transparent background, so only the foreground elements appear when triggered.
The final prototype (not shown in video but can be found in link provided) uses a voice command trigger. When prompted, a user can speak into the microphone and be redirected to a new screen. The trigger for this animation is ‘monstera’ and upon saying this, users are transported to a screen dedicated to monstera’s.
All of these methods are very useful and can be used in different projects. I will use some of these to enhance the Freedom Festival website prototype to better demonstrate my ideas of how each interactive element works.
I followed another tutorial which shows you how to use tap animations to navigate through an app interface. Working on an adventuring app, basic interactions are taught to show how to wire multiple screens together. The tutorial also goes into detail about sticky headers and fixed scrolling positions, which are also helpful tools when prototyping as they create a more realistic feel for clients or stakeholders testing out your website or app and add clarity.
In week four, I followed along with a tutorial from the Google UX Design Certificate. In the tutorial, you are shown how to create a responsive high-fidelity prototype for web and mobile. This tutorial teaches you how to make a webpage for a library, however I adapted this design to fit the Freedom Festival project I am working on. I did this before I began on my brand refresh, which is why you see the old Freedom Festival identity being used.
Most of the animations for this prototype use the basic tap trigger. This is because I felt that I didn’t need to overcomplicate with different effects. Most websites just allow you to click and go straight to a new page. Flashy transitions may also increase loading times between screens and take away some of the professionalism within the site. It is important to know the suitable time and place for crazy effects and transitions.
In the same tutorial, responsive design is also touched upon, and you are shown how to effectively translate your web design to a mobile interface. I liked that I was able to use the skills I have learnt in a realistic design scenario and I felt confident working in XD to create prototypes for a larger scale task.
I used the overlay transition to make the navigation slide in to the left smoothly. This was an appropriate time to use an animation effect because the navigation had to go onto a separate screen, as it wouldn’t all fit on such a small screen size. It was appropriate because it allows the navigation to come in smoothly but still feel a part of the screen as it is overlayed.
This is an effect that I will be using in my final Freedom Festival mobile interface. It is easy to use and understand and makes the website more responsive to a mobile screen.
References:
Capuchino, Kimber (nd) Prototypes: what they are and why they matter in UX Design [Article]. Available online: https://bootcamp.uxdesign.cc/prototypes-what-they-are-and-why-they-matter-in-ux-design-68cbdf0443d1 [Accessed: 21.11.2023]